As I had pointed out in my post about tmux that now I am using tmux to configure and debug multiple servers inside a single window split into panes. Now I ran to another problem I always forgot which pane was meant for which service. Beyond 2 to 3 panes it was getting confusing to remember which pane is monitoring which service. So I remembered my previous post related to tput which allows anybody to show a running clock inside a linux terminal. So I decided to provision a small shell script to fix this issue. Basically I wanted a way to label each pane so that I could effortlessly identify the purpose of the pane inside tmux. So here is the code:
#!/bin/bash

#Display Service Name
function die {
echo "Dying on signal $1"
exit 0
}
function redraw {
local width length;
width=$(tput cols);
str=$1;
length=${#str}+10;
tput sc;
tput cup 0 $((width-length));
set_foreground=$(tput setaf 7)
set_background=$(tput setab 1)
echo -n $set_background$set_foreground
printf ' Service:%s ' $str
tput sgr0;
tput rc;
}
trap 'die "SIGINT"' SIGINT
trap 'die "SIGQUIT"' SIGQUIT
trap redraw WINCH;
while true; do
redraw $*;
sleep 1;
done
This shell script takes a parameter and shows it on the top right column in a red background with white foreground. This script should be invoked in this way.
./ShowTextInTerm.sh service-name &
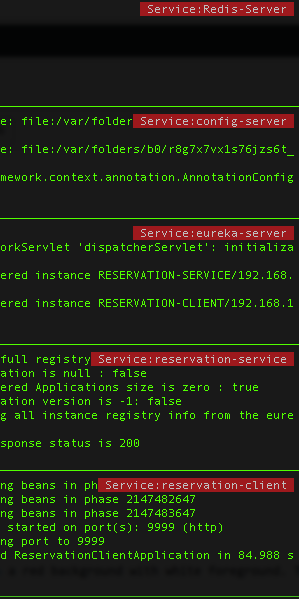
Invoking this script in every tmux pane with relevant substitution for service-name is giving me this result:
Please note that this script works well on my MacBook. I am yet to test it on a Linux terminal.